Laravel Event Listeners
Events in Laravel represent something that has happened in your application, such as a user registration, user deletion, post published, user subscribed, payment confirmation, or any other significant occurrence. Events are like signals or triggers that indicate when certain actions take place.
Listeners are responsible for responding to events. They are code blocks or functions that "listen" for specific events and execute predefined actions when those events occur. For example, you can have a listener that sends a welcome email to a user when they register or a listener that logs a message when an error event is fired.
In summary, events are what happen, and listeners are what respond to those happenings in your Laravel application. They help you decouple and modularize your code, making it easier to manage and maintain.
Create Events Listeners
In this tutorial we will make an event for storing the login information of a user, you can also make an event according to your uses. But this tutorial guides you on how to create and listen to events in Laravel.
So follow the below steps and learn step by step.
Step1: Create a Laravel application
composer create-project laravel/laravel laravel-event-listeners Step2: Go to the application directory
cd laravel-event-listeners Step3: Install ui auth for login registration
composer require laravel/ui
php artisan ui bootstrap --auth
npm installnpm run buildStep 4: Run your project
php artisan serve
Open your browser and check that Laravel ui auth is installed successfully.

Your Laravel UI auth setup is done. Now we will create a table and event for storing login details in the next steps.
Step 5: Create a Model and migration for storing login details
php artisan make:model LoginHistory -mAdd columns to this table
public function up(): void{Schema::create('login_histories', function (Blueprint $table) {$table->id();$table->string('name');$table->string('email');$table->timestamps();});}
Step 6: Run migration
php artisan migrate
Step 7: Create Event Listener
php artisan make:event UserLoginEventphp artisan make:listener SaveLoginDetail --event=UserLoginEvent
You can also create listeners without a given event flag but then you need to manually bind the event with the listener.
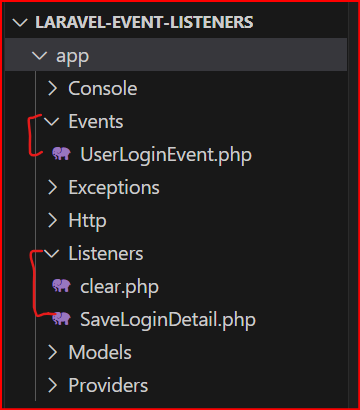
You can see your event in the App\Events directory and listeners in the App\Listeners directory.
Step 8: Register this event and listener in EventServiceProvider
Go to app\Providers\EventServiceProvider and register the event and listener within protected $listen array as key=value pair.
First, import your event and listener
use App\Events\UserLoginEvent;use App\Listeners\SaveLoginDetail;
Now Register like this.
protected $listen = [Registered::class => [SendEmailVerificationNotification::class,],UserLoginEvent::class => [SaveLoginDetail::class,],];

Step 9: Call this event from LoginController
Go to app\Http\Controllers\Auth\LoginController.php and here firstly import UserLoginEvent and then create an authenticated method and call the event from here by passing auth user.
use App\Events\UserLoginEvent;
protected function authenticated() {$user = \Auth::user();event(new UserLoginEvent($user));}
NOTE: The authenticated method is a callback method that you can define in the Auth\LoginController or any custom controller that handles user authentication. This method is automatically called after a user successfully logs in.

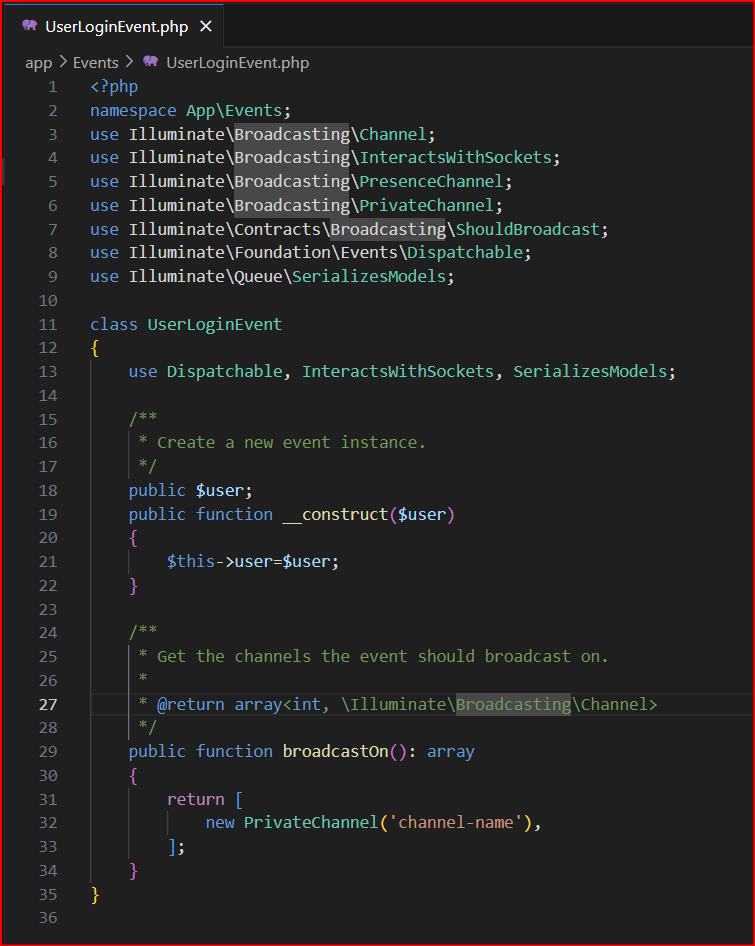
Step 10: Setup Event
Now go to your app\Events\UserLoginEvent.php and here create a public $user variable and initialize it in the constructor method.
public $user;public function __construct($user){$this->user=$user;}
Step 11: Setup Listener
Now go to your app\Listeners\SaveLoginDetail.php and here you can write your login within the handle method.
use Illuminate\Support\Facades\DB;use Carbon\Carbon;
The handle method is a crucial part of event listeners. It defines the logic that should be executed when the associated event is fired.Inside the handle method, you define the actions or tasks that should be performed when the associated event is triggered. You have access to the event object and its properties, allowing you to work with data related to the event.
public function handle(UserLoginEvent $event): void{$user=$event->user;DB::table('login_histories')->insert(['name' => $user->name,'email' => $user->email,'created_at'=>Carbon::now()]);}

Now your app is ready for testing.
Step 12: Testing
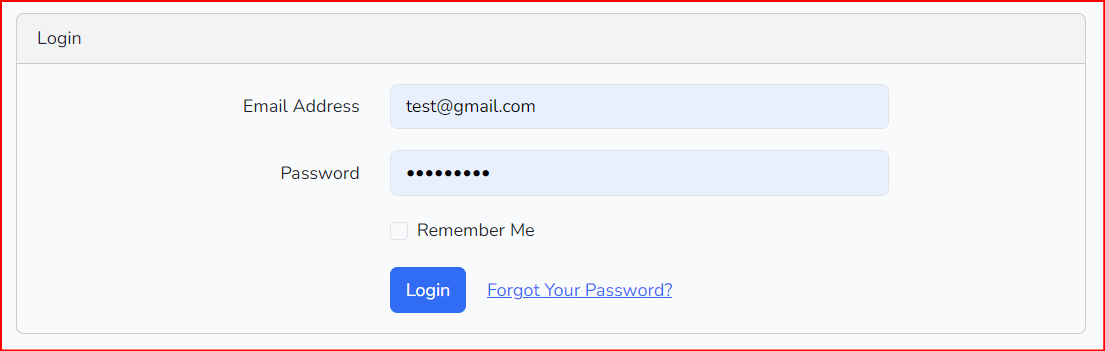
First, we register a user and then log in to it.
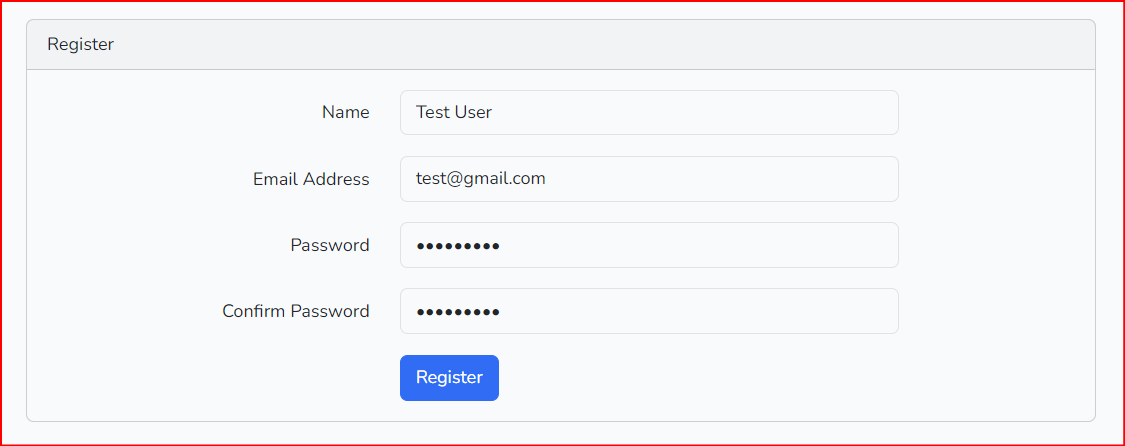
The user is registered Now log in to it.

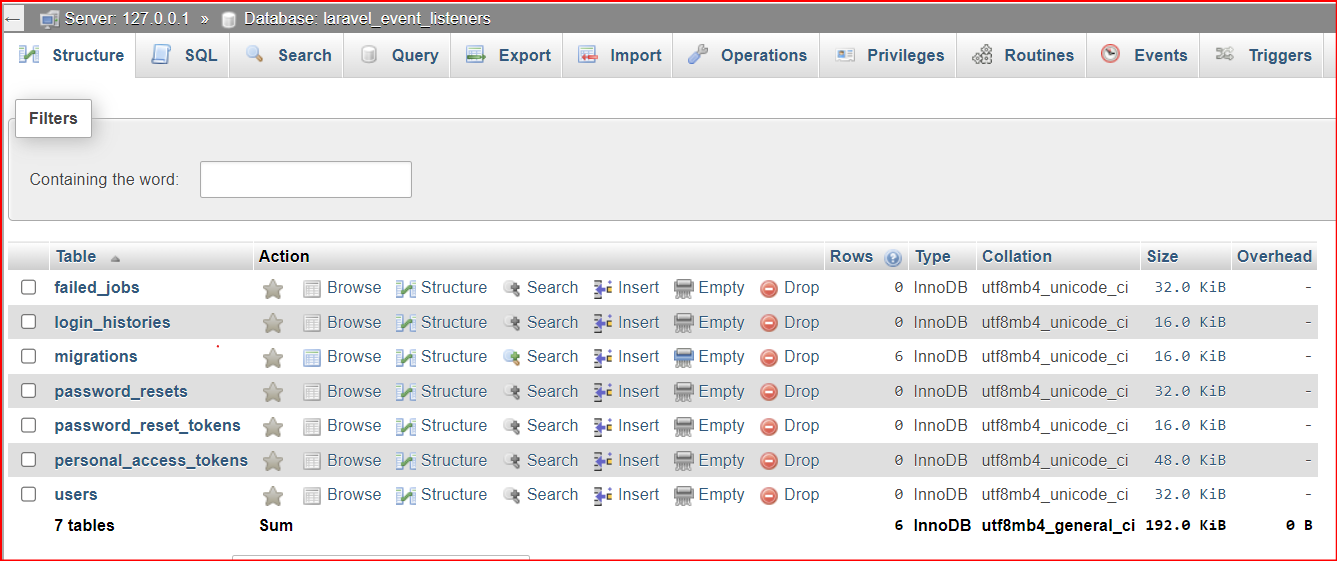
Now open your database and check the login entry in the login histories table.
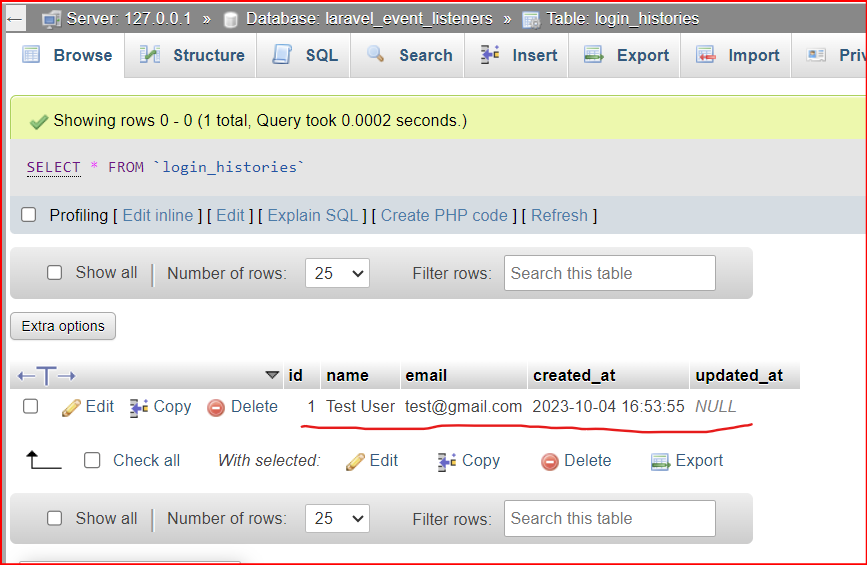
Entry is filled in the login_histories table. So the event and listener are working fine.
Now you can create events and listeners for other tasks. You can create events for sending email notifications when the user registers or a post is published.
If you want to download this project then go to the below link and clone it from GitHub