Laravel Google Login
If you want to add a Google login to your Laravel application then it is very easy to add google or any other social login to the Laravel application. Because Laravel provides a socialite package, with the help of this you can implement social login with a few steps.
To log in with Google, you need 2 things
- Google Client ID and Client Secret key.
- Socialite Package.
So first, we will generate a Google client id and secret key and then will create a Laravel application and implement google login.
Generate Google Client Id and Client Secret Key.
Step 1: Go to console.cloud.google.com and log in with your email id.
https://console.cloud.google.com/
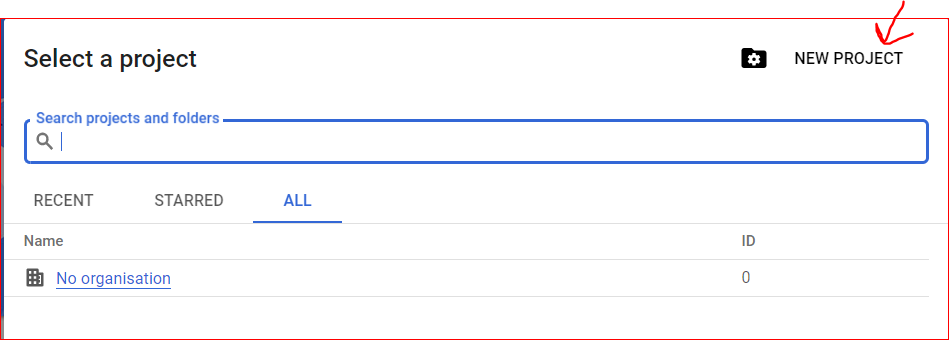
Now Click On Select project

Click on the new project to create a new one.
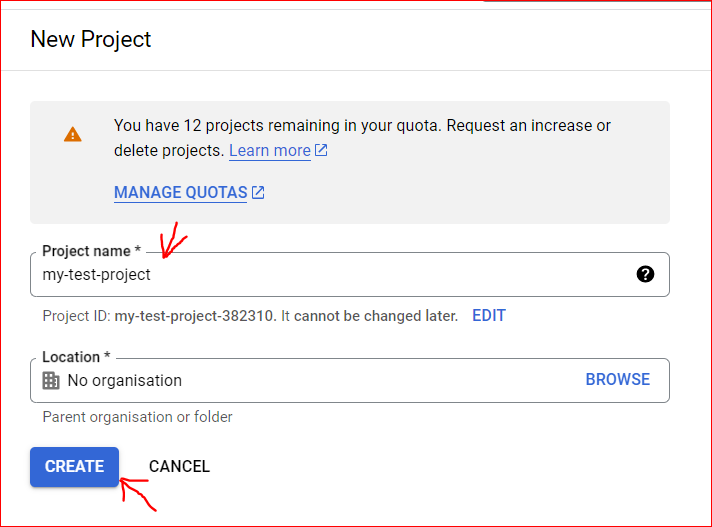
Now fill in the project name and click Create Project button
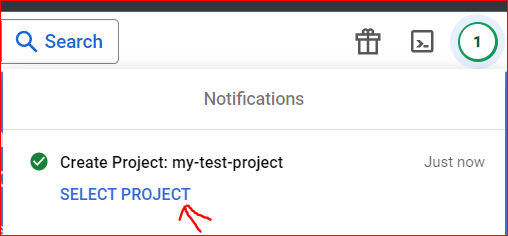
After creating the project select your project and go further steps.
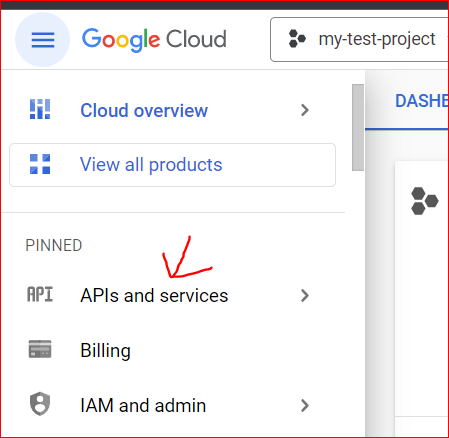
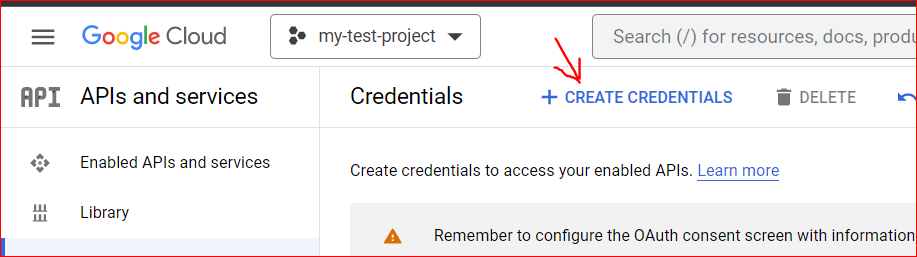
Go to APIs and Services page
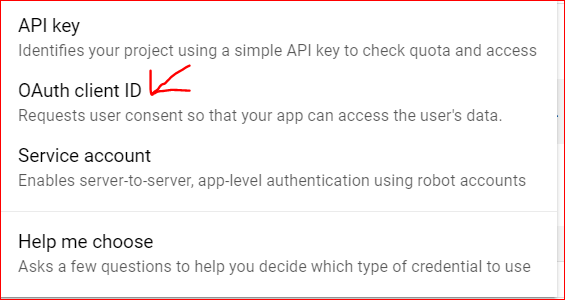
Now go to the Credentials page and then click on Create credentials link and then click OAuth Client Id.

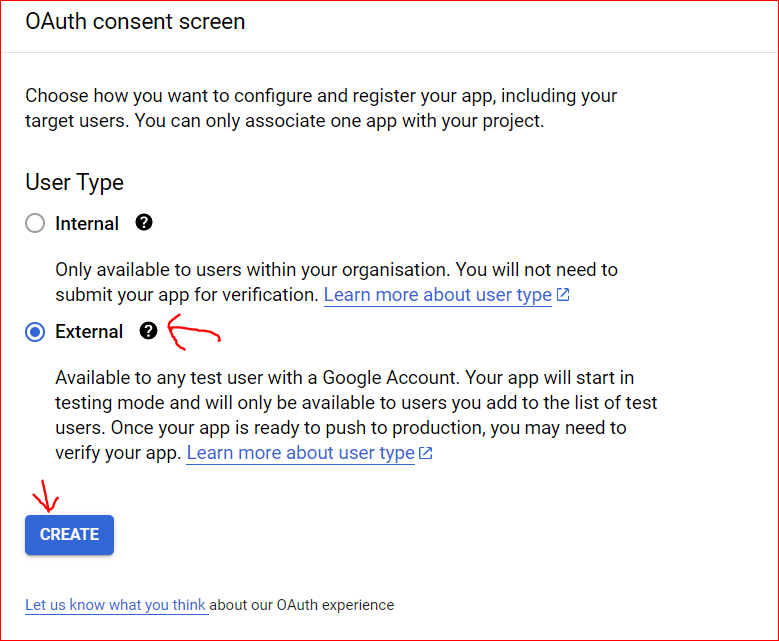
If you creating the first time then it will show you this page for the configuration OAuth consent screen
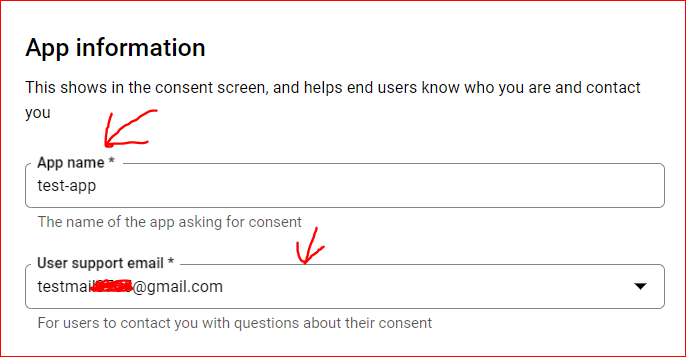
Now complete the concerned screen followed by screenshots

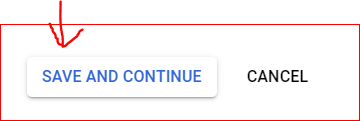
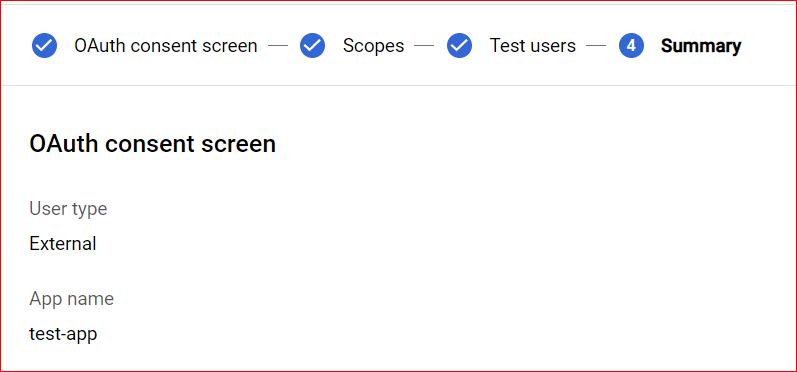
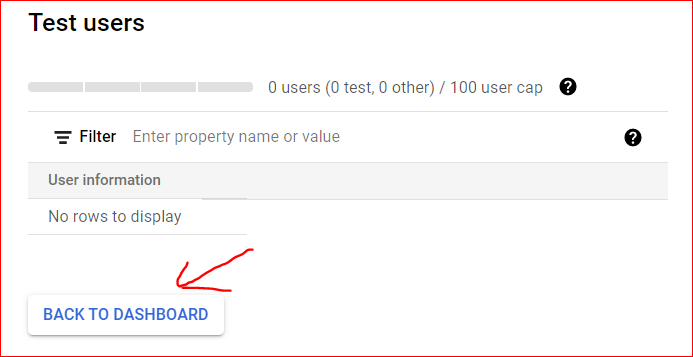
After completing the concerned screen back to the Credentials page
->Create Credentials -> OAuth Client Id

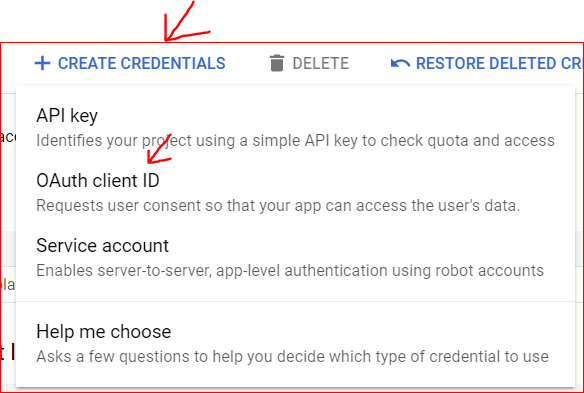
Now fill in your Application type and name of your app
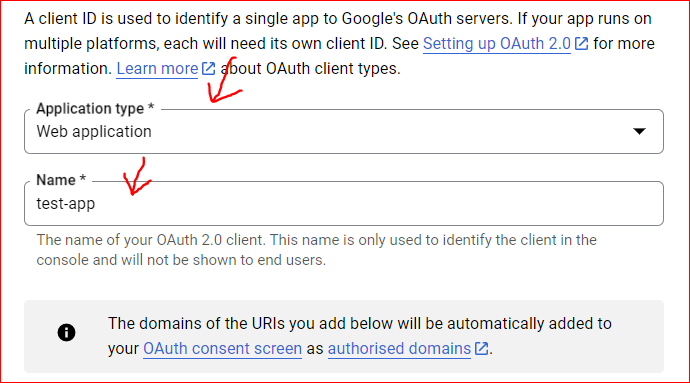
Add URI: add your application domain name
ADD Redirect URI: after successfully authenticating from google, it redirects your application's URI so here give those URI where you want to handle redirect requests.


After giving both URI click on create button and it will generate the client and secret key. note this id and key for further use.

Our first step is completed now make the Laravel app and use Google login functionality.
Step 2: Create app:
laravel new laravel-google-loginORcomposer create-project laravel/laravel-google-login
Step 3: Go to the project directory
cd laravel-google-loginStep 4: Install Socialite package:
composer require laravel/socialiteStep 5: Change in user migrations:
Schema::create('users', function (Blueprint $table) {$table->id();$table->string('firstname');$table->string('lastname')->nullable();$table->string('email')->unique();$table->timestamp('email_verified_at')->nullable();$table->string('login_type')->nullable();$table->string('password');$table->rememberToken();$table->timestamps();});
Step 6: Change in user model:
protected $fillable = ['firstname','lastname','email','login_type','password',];
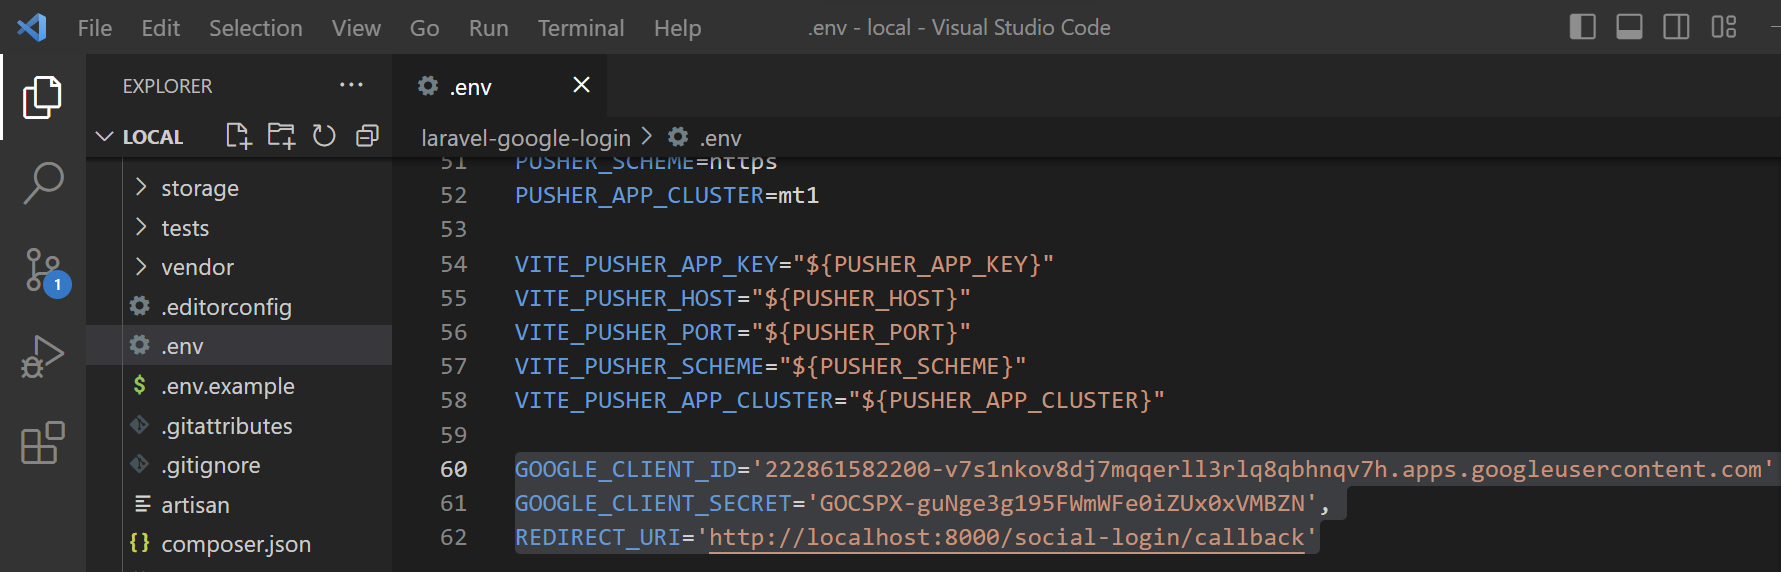
Step 7: Setup .env file
go to your project's .env file and define the client ID, secret code, and redirect URI at the end of the file.
GOOGLE_CLIENT_ID='222861582200-v7s1nkov8dj7mqqerll3rlq8qbhnqv7h.apps.googleusercontent.com'GOOGLE_CLIENT_SECRET='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'REDIRECT_URI='http://localhost:8000/social-login/callback'
Step 8: Setup Services.php file
now go to the config/services.php file and place the Google credentials here also. Because the socialite driver read the OAuth credentials from the services.php file.
'google'=>['client_id' => env('GOOGLE_CLIENT_ID'),'client_secret' => env('GOOGLE_CLIENT_SECRET'),'redirect' => env('REDIRECT_URI'),],

Step 9: Run Migration:
before running the migration, start your Xampp server and create a database (laravel_google_login) and then run the migration command to create tables in your database.
php artisan migrate

Step10: Create Controller:
Create a controller (SocialLoginController) where you will write the logic for google login.
php artisan make:controller SocialLoginControllerStep 11: Create routes:
Step 12: Write logic in SocialLoginController
Step 13: Now create blade files:
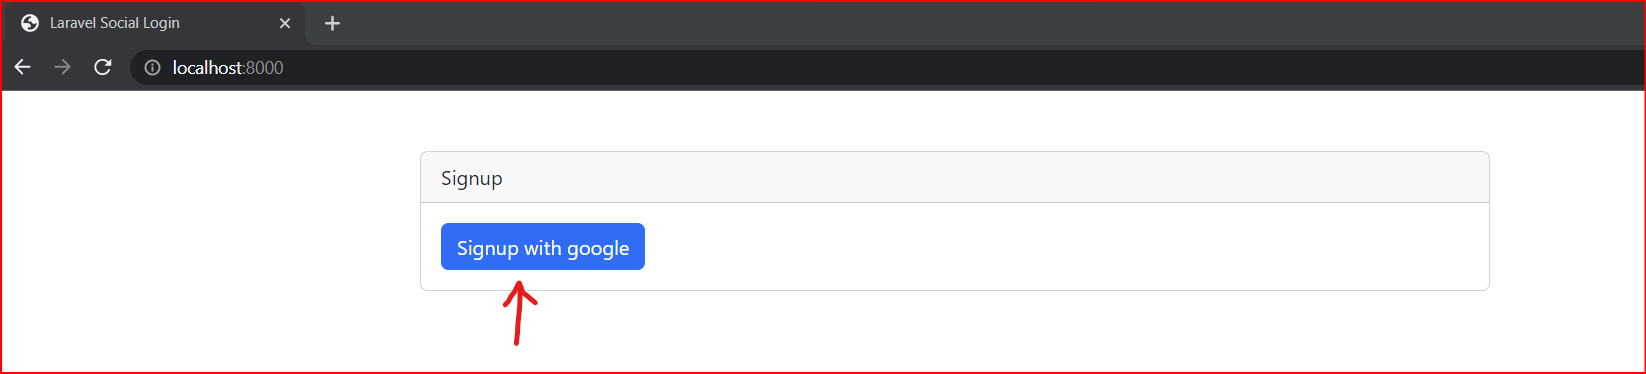
Welcome.blade.php
<!DOCTYPE html><html lang="en"><head><meta charset="UTF-8"><meta name="viewport" content="width=device-width, initial-scale=1.0"><meta http-equiv="X-UA-Compatible" content="ie=edge"><title>Laravel Social Login</title><link href="https://cdn.jsdelivr.net/npm/bootstrap@5.3.0-alpha2/dist/css/bootstrap.min.css" rel="stylesheet"><script src="https://cdn.jsdelivr.net/npm/bootstrap@5.3.0-alpha2/dist/js/bootstrap.bundle.min.js"></script></head><body><div class="container mt-5"><div class="row justify-content-center"><div class="col-sm-8"><div class="card"><div class="card-header">Signup</div><div class="card-body"><a href="{{route('google-login')}}" class="btn btn-primary">Signup with google</a></div></div></div></div></div></body></html>
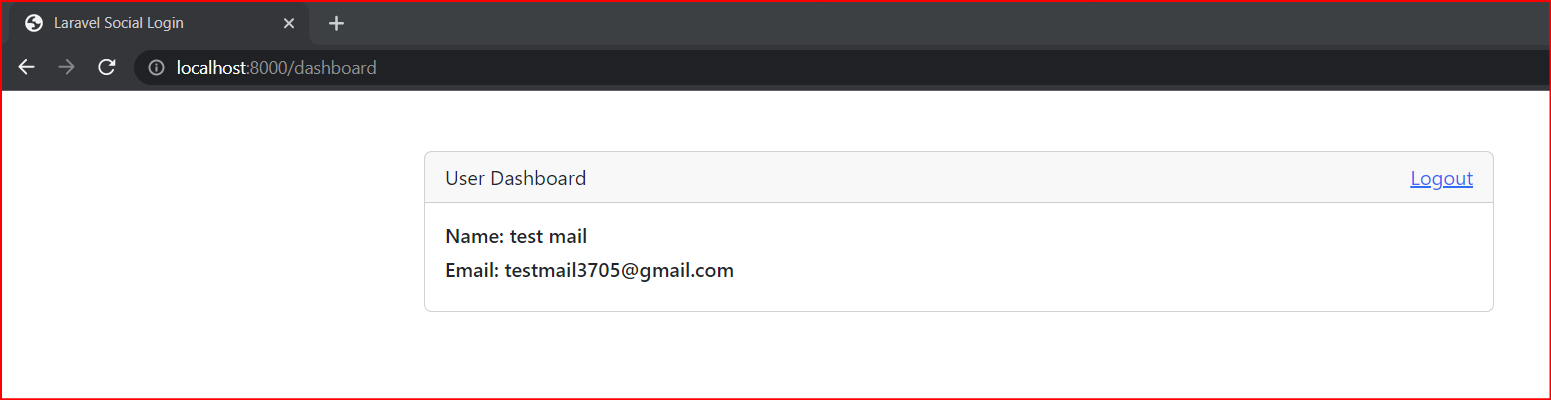
dashboard.blade.php
<!DOCTYPE html><html lang="en"><head><meta charset="UTF-8"><meta name="viewport" content="width=device-width, initial-scale=1.0"><meta http-equiv="X-UA-Compatible" content="ie=edge"><title>Laravel Social Login</title><link href="https://cdn.jsdelivr.net/npm/bootstrap@5.3.0-alpha2/dist/css/bootstrap.min.css" rel="stylesheet"><script src="https://cdn.jsdelivr.net/npm/bootstrap@5.3.0-alpha2/dist/js/bootstrap.bundle.min.js"></script></head><body><div class="container mt-5"><div class="row justify-content-center"><div class="col-sm-8"><div class="card"><div class="card-header">User Dashboard<a href="/logout" class="float-end">Logout</a></div><div class="card-body"><h6>Name: {{auth()->user()->firstname.' '.auth()->user()->lastname}}</h6><h6>Email: {{auth()->user()->email}}</h6></div></div></div></div></div></body></html>
Step 14: Run your app:
php artisan serve

Project Download Link:
https://github.com/vaidikalaya/laravel-google-login