Image Upload In Livewire
Laravel Livewire is a full-stack framework for Laravel if you want to work with Livewire then it is an important topic for you where you will learn how to upload images in Livewire. So follow the given steps and learn to upload images in Livewire.
STEP 1: Create a Laravel app
First, create a Laravel app using the artisan command.
laravel new livewire-image-uploadSTEP 2: Go to the app directory
cd livewire-image-uploadSTEP 3: Install livewire
composer require livewire/livewireIf you want to publish the config file the run below artisan command.
php artisan livewire:publish --configSTEP 4: Create livewire Component
Create a livewire component where you write the logic for uploading images. run the below artisan command for creating the Livewire component. It will create two files, one is a blade file in (resources/views/livewire) where you can write your front-end code and another is a class file (App\Http\Livewire) from where you can render your blade file and write logic for uploading images.
php artisan make:livewire ImageUploadSTEP 5: Set up blade file or front-end
copy the given code and paste it into the welcome.blade.php file.
<!DOCTYPE html><html lang="en"><head><title>Livewiretitle><link href="https://cdn.jsdelivr.net/npm/bootstrap@5.2.3/dist/css/bootstrap.min.css" rel="stylesheet"><script src="https://cdn.jsdelivr.net/npm/bootstrap@5.2.3/dist/js/bootstrap.bundle.min.js">script>@livewireStyleshead><body>@livewire('image-upload')@livewireScriptsbody>html>
STEP 6: Setup image-upload.blade.php
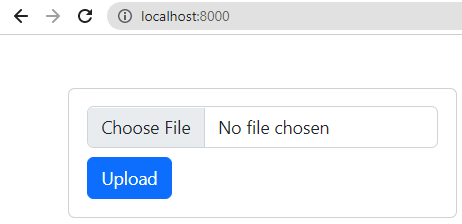
<div><div class="container d-flex mt-5"><div class="card"><div class="card-body">@error('image')<div class="alert alert-danger show">{{ $message }}</div>@enderror<input type="file" wire:model="image" class="form-control" required><button class="btn btn-primary mt-2" wire:click="uploadImage()">Upload</button>div>@if(session('success_msg'))<div class="card-footer"><div class="alert alert-success show">{{ session('success_msg') }}</div>@if(session('uploaded_img'))<img src="{{session('uploaded_img')}}" height="50px" width="50px">@endif</div>@endif</div></div></div>
STEP 7: Write Image Upload Logic and Store in the default location
now go to app\http\livewire\ImageUpload.php file and here you will write your logic for uploading the image.
first, add the WithFileUploads trait because without it livewire can't read files data So it is mandatory to add it to your class file.
after that make an uploadImage method which will call when you click the upload button.
<?phpnamespace App\Http\Livewire;use Livewire\Component;use Livewire\WithFileUploads;class ImageUpload extends Component{use WithFileUploads;public $image;public function uploadImage(){$this->validate(['image' => 'image|max:1024', // 1MB Max]);$res=$this->image->store('images'); //it is save your file store\app\images directoryreturn back()->with('success_msg', 'image uploaded');}public function render(){return view('livewire.image-upload');}}

livewire store() method uploads your file store\app\images directory and images are not accessible from this directory. So you need to store your images in a public directory. For uploading images in the public directory follow the given steps.
STEP 8: Save the Image in a public directory
It is tricky to save images in a public directory with Livewire if you use Laravel you can simply save images in a public directory but with Livewire, you can't do so directly so follow the given steps to save images in a public directory.
first, make a driver for the public directory: go to config\filesystems.php file, and here make a driver for a public directory.
'custom_public_path' => ['driver' => 'local','root' => public_path('uploads'),'url' => env('APP_URL').'/public','visibility' => 'public',],

STEP 9: Now write the given logic for uploading image in the public directory
now It will store your image in the public directory which you can use anywhere in your project.
 copy
copy
OUTPUT
 ----->